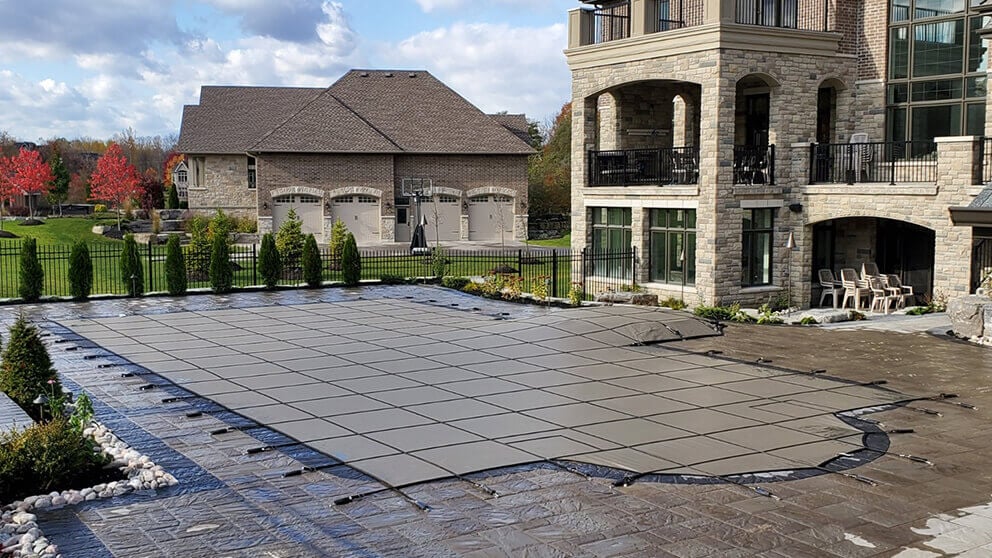
Installing a winter safety cover requires precise anchor placement and balanced spring tension. Follow our pool safety cover installation guide to set up deck anchors, attach corner springs, and protect your pool.
Review our Pool Safety Cover Measuring Guide first if you still need deck dimensions. Visit our PSP Pool Safety Cover page to explore hardware specs and fabric options.
Pool Safety Cover Installation Guide for Standard Concrete Decks
Standard concrete decks require brass pop-up anchors and stainless steel tension springs. Follow these four steps to anchor your cover across standard pool perimeters.
Step 1: Prepare and Position the Cover
Clear all ladders, handrails, and equipment from your pool deck. Measure your pool and safety cover to confirm a precise fit. Select a cover 2 to 3 feet larger than your pool for a 3-foot grid system. Choose a cover 1.5 to 2 feet larger for a 5-foot grid system. Spread the cover across your pool surface. Adjust the overlap evenly on all sides and corners. Maintain 11 to 14 inches of overlap for a 5-foot grid cover. Maintain 13 to 18 inches of overlap for a 3-foot grid cover. Pull the cover tightly to remove packing wrinkles. Attach buckles, springs, and protective spring covers to straps at all eight corner locations. Adjust strap lengths to match equally across all corners.
Step 2: Install Corner Anchors
Install brass anchors at the four corners of your cover first. Measure 18 inches straight out from the cover edge along each strap line. Mark your anchor spots on the concrete deck surface. Drill holes 2 to 3 inches deep using a 3/4-inch concrete bit in a rotary hammer drill. Clean all concrete dust out of each drilled hole. Hammer the brass anchors into position using your tamping tool. Insert the anchor screws using your hex key.
Step 3: Attach Corner Springs
Attach corner springs to the brass anchors using your installation rod. Position the notched end of the rod toward the pool. Pull the rod handle away from the pool until the heel slips over the anchor. Verify equal cover overlap on all sides and ends. Adjust strap lengths at the buckles to balance tension. Compress springs 10% to 20% to achieve proper overall tension.
Step 4: Install Remaining Anchors and Springs
Attach buckles, springs, and covers to all remaining straps. Measure 18 inches straight back from the cover edge along each strap path. Drill and install remaining brass anchors into your concrete deck. Connect springs to anchors using your installation rod. Start at the center strap on each side. Work systematically back and forth across opposite sides to balance tension across the deck.
Wood Deck and Form Fit Safety Cover Installation
Specialized pool decks and custom pool shapes require specific anchoring techniques. Use these steps for wood decks or form-fit installations.
Step 5: Wood Deck Anchor Installation
Drill a 1/8-inch deep recess hole using a 1.5-inch wood bit. Drill a 3/4-inch diameter hole 2 inches deep through the center of that recess. Insert your wood deck brass anchor into the finished hole. Secure the anchor flange with the four wood screws provided in your kit.
Step 6: Form Fit Installation
Lay out your custom safety cover over the pool. Verify equal overlap around the entire pool perimeter. Mark and drill holes for four side anchors starting at the center points. Install two brass anchors on each side wall. Secure the center springs while alternating from side to side. Mark and drill remaining anchor locations around the perimeter. Complete the installation by working continuously back and forth across the pool.
Off-Season Safety Cover Removal and Storage
Proper removal and storage extend the lifespan of your winter cover. Follow this procedure when opening your pool for the summer season.
Step 7: Remove Your PSP Safety Cover
Insert your installation rod between the spring and the anchor head. Tilt the rod handle toward the pool cover to slide the spring off the anchor. Pull the cover carefully off the pool surface. Clean all surface debris from the fabric and fold the cover neatly. Store your dry cover inside the provided mesh storage bag. Screw all brass anchors down flush with your deck using your hex key. Ensure equal spring tension and a wrinkle-free cover upon completing installation.
Professional Safety Cover Installation Support in Winnipeg
Bring your questions to our Crown Spas & Pools showroom in Winnipeg. Our specialists help you select winter cover accessories and hardware replacement parts. We submit custom orders directly to PSP Fabricating for precision manufacturing. Visit our PSP Pool Safety Cover page to explore material grades and color options. Contact our team today to request professional pool safety cover installation assistance.